When reading this blog post, you may be thinking that there's nothing new one can add to emailing with PowerShell as there were tons of articles in recent years covering this subject pretty good. It's all known, and people have used it since the early days of PowerShell. You can even send an email with just one line using Send-MailMessage. Now, this post is not about that. This post is about sending HTML based emails. You see when you want to send an email that is just text based that's pretty trivial. Things get complicated when you want your emails to have some colors, some tables, some links or some lists. This is where you have to involve HTML and CSS. Since I've been working with PowerShell for a while now, I've seen my share of scripts/modules or blog posts that cover this but one thing that usually hit me – it was sometimes tough to understand what is happening, what the author is doing, and what happens if I change this or that. While I've seen people dismissing programmers doing HTML / CSS or JavaScript for not being real programmers, I disagree entirely. You have to know what you're doing if you want your stuff to look good. I've spent days or even weeks playing with HTML/CSS/JS, and I must admit half of what I do I don't even understand until I see the output. So before you go and tell people that HTML/CSS is easy, think again.
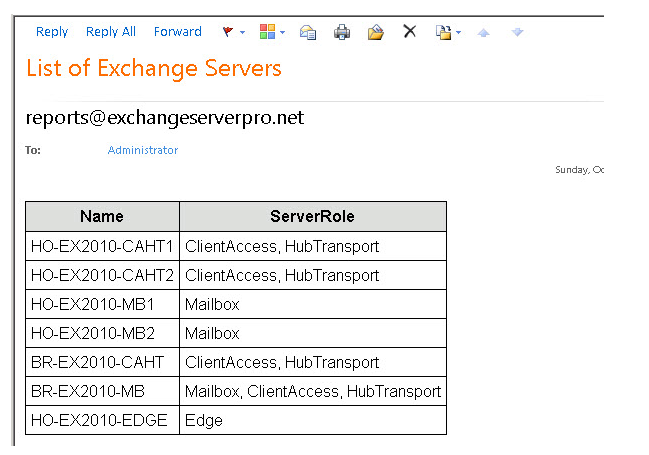
But that's not what I wanted to explain here. I wanted to show you a different way to send emails. You see if you type into google How to send HTML email PowerShell, you will see a standard way of sending emails. Paul Cunningham shows it like this:
$style = ""
This is a standard way of dealing with emails in PowerShell. You have to apply styles, know how to deal with headers, footers, fonts and so on. What you see above is a simple styling of a table, but if you want to have colors and some fancy stuff, it gets harder, much harder.
💡 Emailimo – Simple Password Notification example
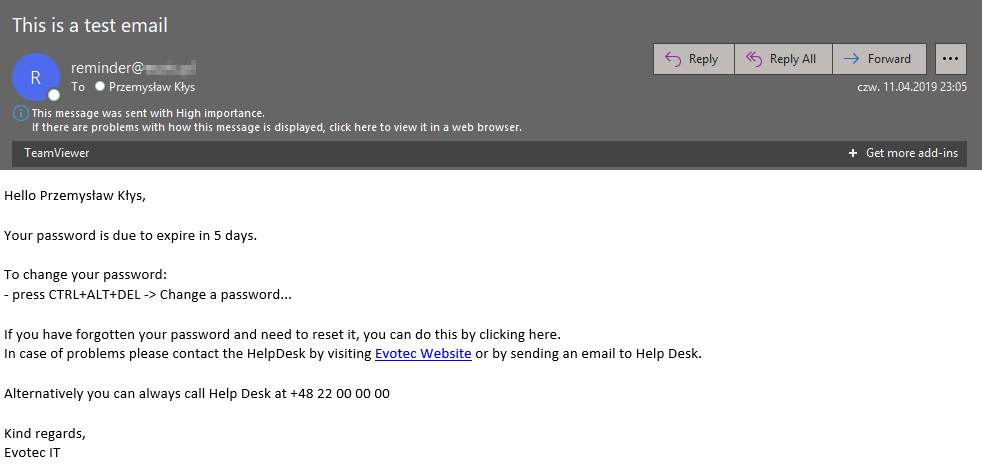
Now what you see below is email created and sent using Emailimo. It's a simple example of HTML with Calibri Font of size 15 with one link.
Import-Module PSWriteHTML -Force
Import-Module Emailimo -Force

### Prepare your data:

$UserNotify = 'Przemysław Kłys'
$PasswordExpiryDays = 5


Email -WhatIf {
    EmailHeader {
        EmailFrom -Address '[email protected]'
        EmailTo -Addresses "[email protected]"
        EmailServer -Server 'mail.evotec.com' -UserName 'YourUsername' -Password 'C:\Support\Important\Password-Evotec-Reminder.txt' -PasswordAsSecure -PasswordFromFile
        EmailOptions -Priority High -DeliveryNotifications Never
        EmailSubject -Subject 'This is a test email'
    }
    EmailBody -FontFamily 'Calibri' -Size 15 {
        EmailTextBox {
            "Hello $UserNotify,"
            ""
            "Your password is due to expire in $PasswordExpiryDays days."
            ""
            'To change your password: '
            '- press CTRL+ALT+DEL -> Change a password...'
            ''
            'If you have forgotten your password and need to reset it, you can do this by clicking here. '
            "In case of problems please contact the HelpDesk by visiting [Evotec Website](https://evotec.xyz) or by sending an email to Help Desk."
            ''
            'Alternatively you can always call Help Desk at +48 22 00 00 00'
            ''
            'Kind regards,'
            'Evotec IT'
        }
        EmailText -LineBreak
    }
}
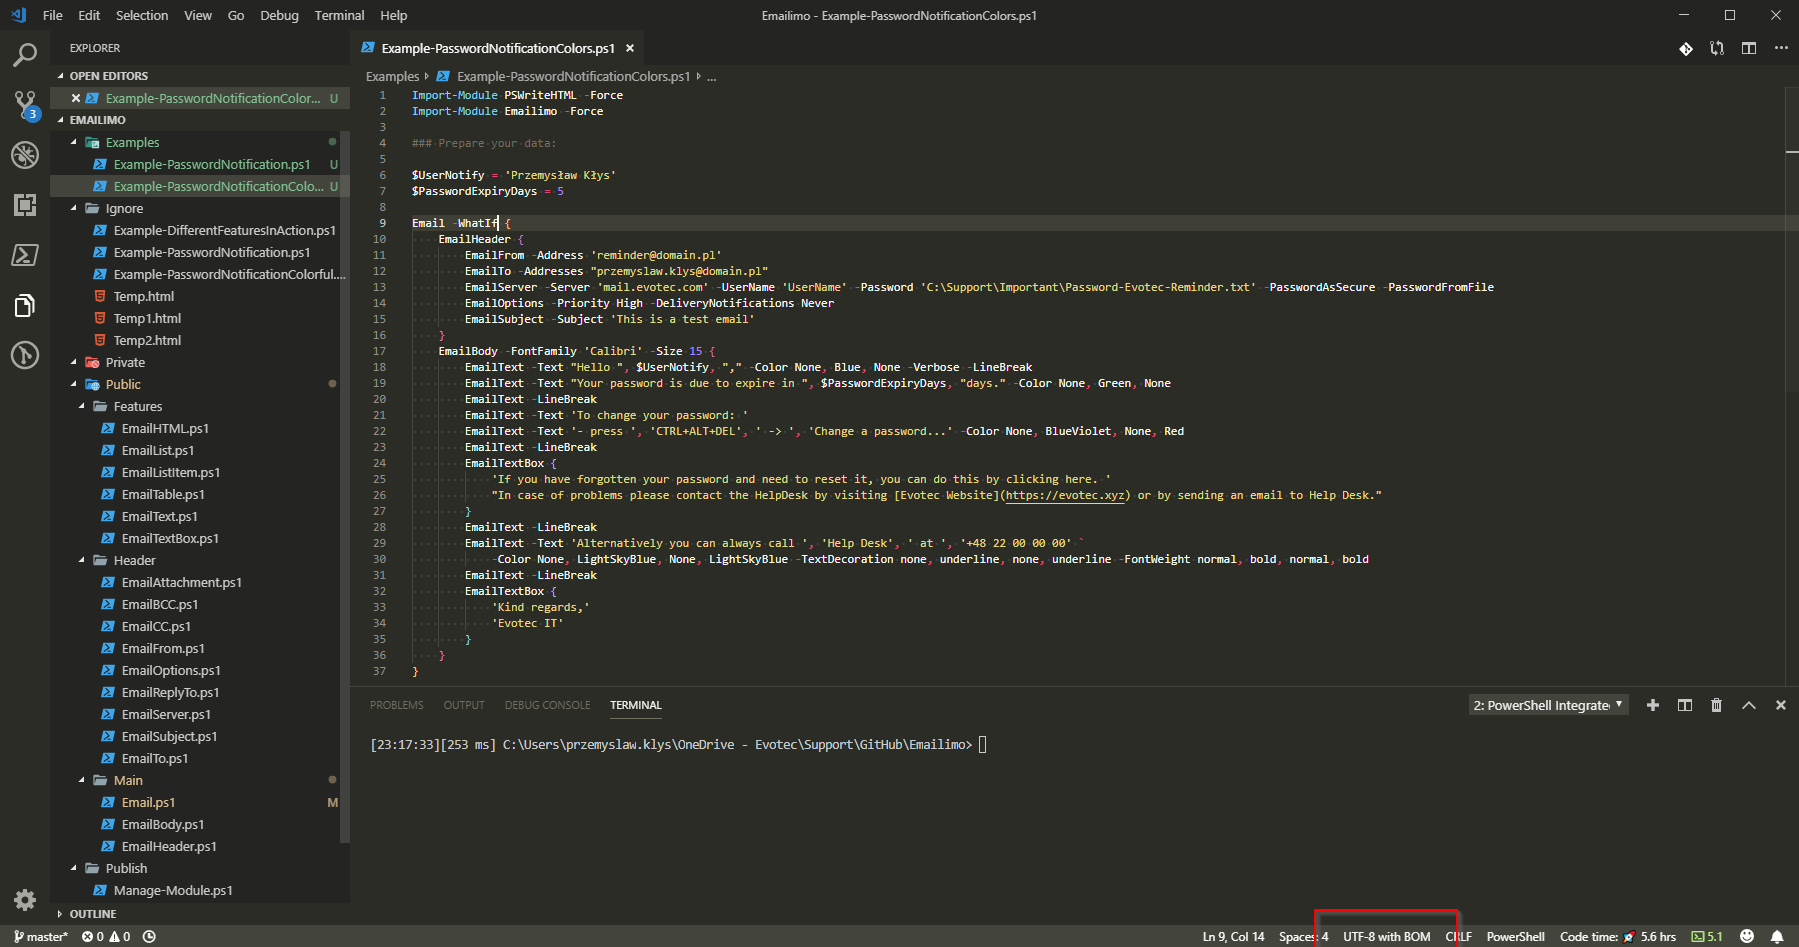
As you see above, the way it works is that you open Email, and in the email, you have two other sections EmailHeader and EmailBody. EmailHeader is what you see in outlook where you define EmailFrom, EmailTo, EmailOptions, and EmailSubject. Of course, in the case of PowerShell, you also have to define EmailServer. Now I've added all those options as parameters to Email so if you prefer to use it as parameters of an Email be my guest. If you define both, EmailHeader will overwrite values that are set in it.
Import-Module PSWriteHTML -Force
Import-Module Emailimo -Force

### Prepare your data:

$UserNotify = 'Przemysław Kłys'
$PasswordExpiryDays = 5

Email -To '[email protected]' -Server 'mail.domain.com' -From '[email protected]' -Subject 'Tis is a test email' -Username 'UserName' -Password 'C:\Support\Important\Password-Evotec-Reminder.txt' -PasswordAsSecure -PasswordFromFile -Priority High -DeliveryNotifications Never {
    EmailBody -FontFamily 'Calibri' -Size 15 {
        EmailTextBox {
            "Hello $UserNotify,"
            ""
            "Your password is due to expire in $PasswordExpiryDays days."
            ""
            'To change your password: '
            '- press CTRL+ALT+DEL -> Change a password...'
            ''
            'If you have forgotten your password and need to reset it, you can do this by clicking here. '
            "In case of problems please contact the HelpDesk by visiting [Evotec Website](https://evotec.xyz) or by sending an email to Help Desk."
            ''
            'Alternatively you can always call Help Desk at +48 22 00 00 00'
            ''
            'Kind regards,'
            'Evotec IT'
        }
        EmailText -LineBreak
    }
}
Alternatively, you could use a splat, which some PowerShell people prefer as a way to deal with large parameter sets.
Import-Module PSWriteHTML -Force
Import-Module Emailimo -Force

### Prepare your data:

$UserNotify = 'Przemysław Kłys'
$PasswordExpiryDays = 5

$emailSplat = @{
    PasswordFromFile      = $true
    Username              = 'UserName'
    Server                = 'mail.domain.com'
    Password              = 'C:\Support\Important\Password-Evotec-Reminder.txt'
    DeliveryNotifications = 'Never'
    PasswordAsSecure      = $true
    Subject               = 'Tis is a test email'
    From                  = '[email protected]'
    Priority              = 'High'
    To                    = '[email protected]'
}
Email @emailSplat {
    EmailBody -FontFamily 'Calibri' -Size 15 {
        EmailTextBox {
            "Hello $UserNotify,"
            ""
            "Your password is due to expire in $PasswordExpiryDays days."
            ""
            'To change your password: '
            '- press CTRL+ALT+DEL -> Change a password...'
            ''
            'If you have forgotten your password and need to reset it, you can do this by clicking here. '
            "In case of problems please contact the HelpDesk by visiting [Evotec Website](https://evotec.xyz) or by sending an email to Help Desk."
            ''
            'Alternatively you can always call Help Desk at +48 22 00 00 00'
            ''
            'Kind regards,'
            'Evotec IT'
        }
        EmailText -LineBreak
    }
}
The effect will be the same, but it's a matter of readability. You see, I wrote Emailimo because I wanted to have a clear solution. Something that when I look at it resembles an email composed in Outlook (to an extent). And that's what you see in first PowerShell code, and it's what you will see below.
💡 Emailimo – Simple Password Notification example with colors
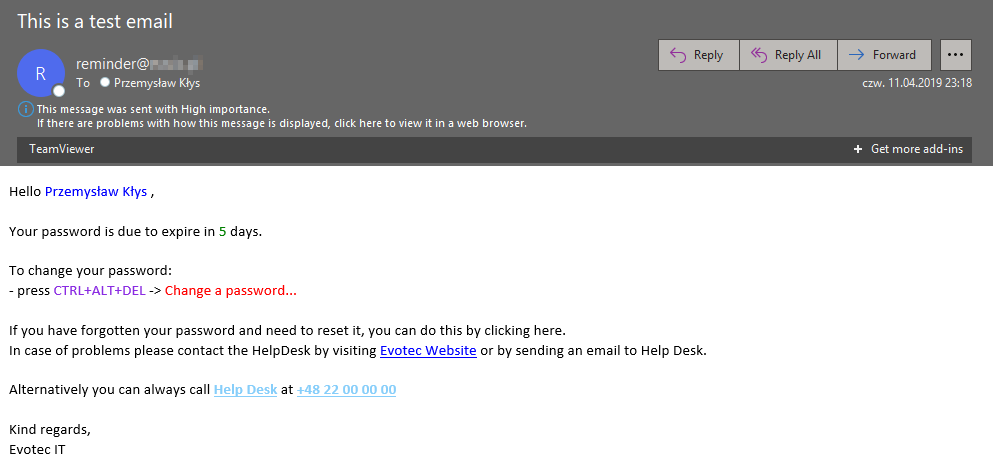
It's precisely the same example as above with the difference we wanted to treat email with some colors, links, and show you a couple of different approaches.
Import-Module PSWriteHTML -Force
Import-Module Emailimo -Force

### Prepare your data:

$UserNotify = 'Przemysław Kłys'
$PasswordExpiryDays = 5

Email {
    EmailHeader {
        EmailFrom -Address '[email protected]'
        EmailTo -Addresses "[email protected]"
        EmailServer -Server 'mail.evotec.com' -UserName 'UserName' -Password 'C:\Support\Important\Password-Evotec-Reminder.txt' -PasswordAsSecure -PasswordFromFile
        EmailOptions -Priority High -DeliveryNotifications Never
        EmailSubject -Subject 'This is a test email'
    }
    EmailBody -FontFamily 'Calibri' -Size 15 {
        EmailText -Text "Hello ", $UserNotify, "," -Color None, Blue, None -Verbose -LineBreak
        EmailText -Text "Your password is due to expire in ", $PasswordExpiryDays, "days." -Color None, Green, None
        EmailText -LineBreak
        EmailText -Text 'To change your password: '
        EmailText -Text '- press ', 'CTRL+ALT+DEL', ' -> ', 'Change a password...' -Color None, BlueViolet, None, Red
        EmailText -LineBreak
        EmailTextBox {
            'If you have forgotten your password and need to reset it, you can do this by clicking here. '
            "In case of problems please contact the HelpDesk by visiting [Evotec Website](https://evotec.xyz) or by sending an email to Help Desk."
        }
        EmailText -LineBreak
        EmailText -Text 'Alternatively you can always call ', 'Help Desk', ' at ', '+48 22 00 00 00' `
            -Color None, LightSkyBlue, None, LightSkyBlue -TextDecoration none, underline, none, underline -FontWeight normal, bold, normal, bold
        EmailText -LineBreak
        EmailTextBox {
            'Kind regards,'
            'Evotec IT'
        }
    }
}
Notice how I used EmailText and EmailTextBox. Those have the same parameters (Colors, Fonts, Styles and so on) but they act a bit differently. Besides using links (in the form of a markdown), I've used some colors and also added TextDecoration of underline and FontWeight of Bold. There are multiple other parameters exposed. If you know Write-Color (PSWriteColor module) you should be familiar with this approach.
💡 Emailimo – Couple of features in action
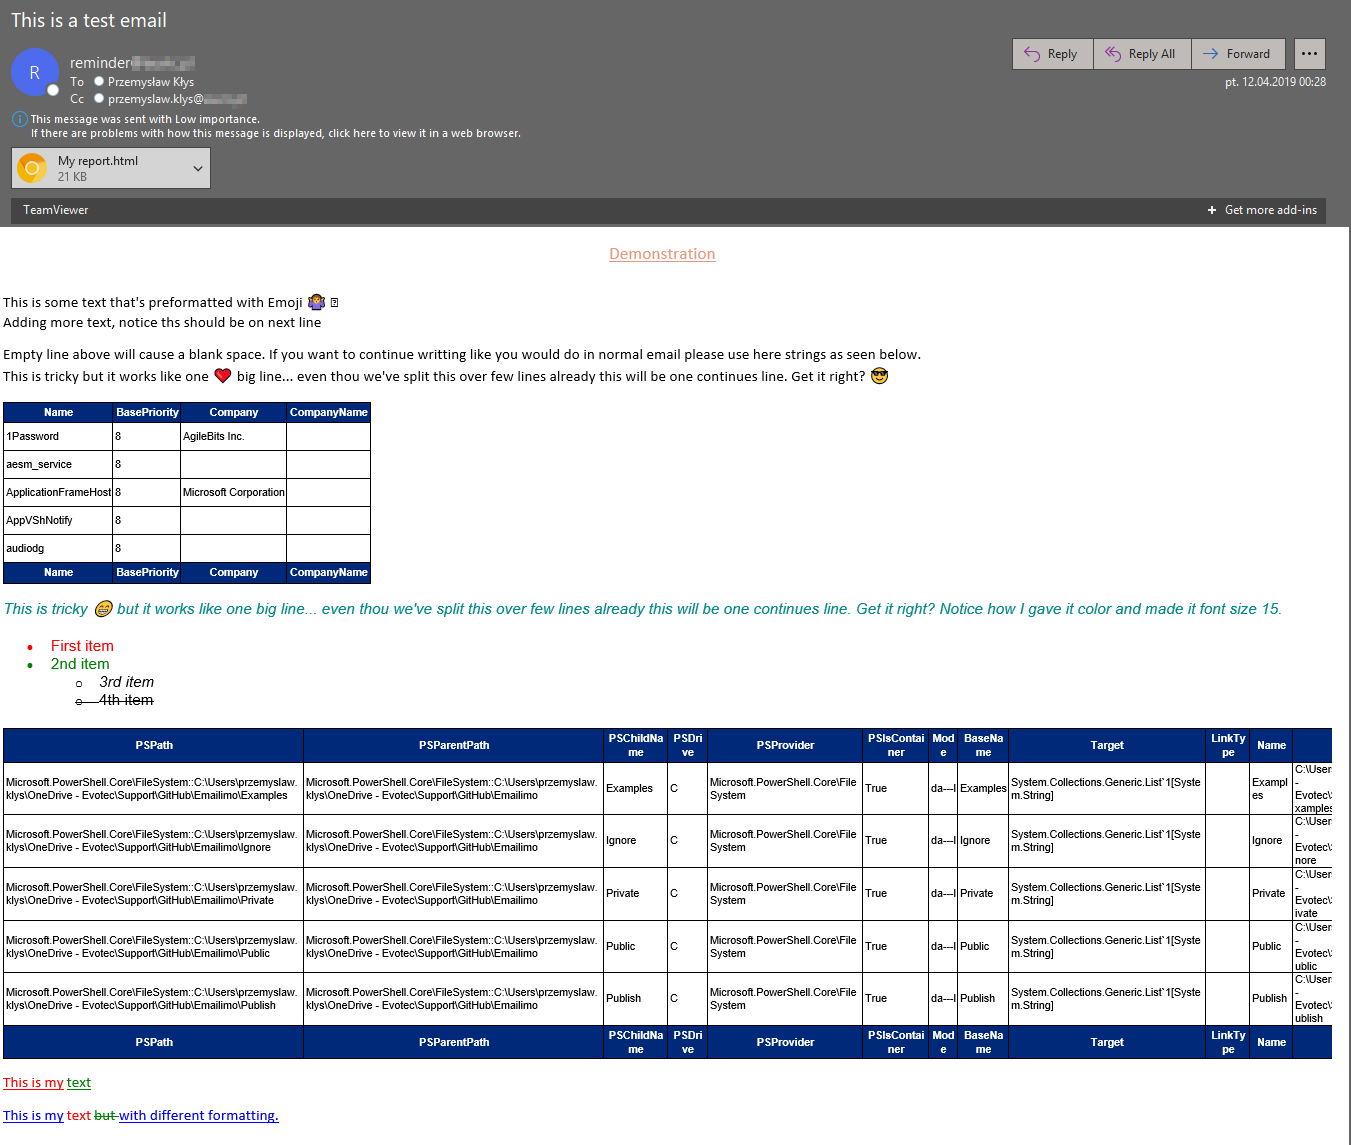
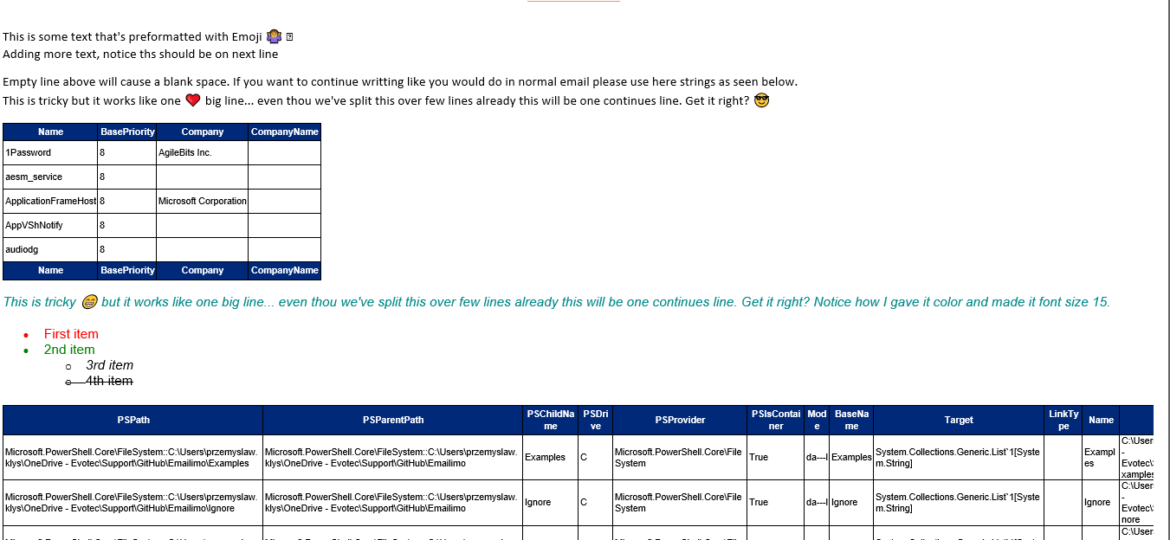
Below example is showing a couple of other features in action including Lists, Tables and some additional formatting. Of course, emoji is also added.
Import-Module PSWriteHTML -Force
Import-Module Emailimo -Force
if ($null -eq $Table) {
$Table = (Get-Process | Select-Object -First 5 -Property Name, BasePriority, Company, CompanyName)
}
if ($null -eq $Table1) {
$Table1 = (Get-ChildItem | Select-Object -First 5)
}
Email -AttachSelf -AttachSelfName 'My report' {
EmailHeader {
EmailFrom -Address '[email protected]'
EmailTo -Addresses "[email protected]"
EmailCC -Addresses "[email protected]"
EmailBCC -Addresses "[email protected]"
EmailServer -Server 'mail.domain.pl' -UserName 'UserName' -Password 'C:\Support\Important\Password-Evotec-Reminder.txt' -PasswordAsSecure -PasswordFromFile
EmailOptions -Priority Low
EmailSubject -Subject 'This is a test email'
}
EmailBody {
EmailTextBox -FontFamily 'Calibri' -Size 17 -TextDecoration underline -Color DarkSalmon -Alignment center {
'Demonstration'
}
EmailText -LineBreak
EmailTextBox -FontFamily 'Calibri' -Size 15 {
"This is some text that's preformatted with Emoji 🤷 ️"
"Adding more text, notice ths should be on next line"
""
"Empty line above will cause a blank space. If you want to continue writting like you would do in normal email please use here strings as seen below."
@"
This is tricky but it works like one ❤
big line... even thou we've split this over few lines
already this will be one continues line. Get it right? 😎
"@
""
}
EmailTable -Table $Table
EmailTextBox -FontSize 15 -Color DarkCyan -FontStyle italic {
""
@"
This is tricky 😁 but it works like one
big line... even thou we've split this over few lines
already this will be one continues line. Get it right?
Notice how I gave it color and made it font size 15.
"@
""
}
EmailList -FontSize 15 {
EmailListItem -Text 'First item' -Color Red
EmailListItem -Text '2nd item' -Color Green
EmailList {
EmailListItem -Text '3rd item' -FontStyle italic
EmailListItem -Text '4th item' -TextDecoration line-through
}
}
EmailTable -Table $Table1
EmailText -LineBreak
EmailText -FontSize 15 -Text 'This is my', 'text' -Color Red, Green -TextDecoration underline -FontFamily 'Calibri'
EmailText -LineBreak
EmailText -FontSize 15 -Text 'This is my', 'text', ' but ', ' with different formatting.' -Color Blue, Red, Green -TextDecoration underline, none, 'line-through' -FontFamily 'Calibri'
EmailText -LineBreak
}
}
As you can see in the code above Email function also has two additional options AttachSelf and AttachSelfName. They allow defining that you want the same email to be attached in the form of HTML file to your email. Why would you do it? Well, while Outlook and other email Clients don't allow for JavaScript to work, when you double click on that HTML, it will display a bit nicer version that you probably already know from Dashimo, Out-HtmlView or PSWriteHTML. It's also possible that when some things don't display in Outlook because those are using JavaScript, you can attach them and have your manager display it if needed. This would give you a bit of both – Simplified email and advanced attachment.
💡 Emailimo – Ideas to explore
I am not yet sure where I am going with Emailimo, as it is a bit of a concept, but I'll be experimenting with it from time to time. Things I've thought would be cool to have.
- 📝 Markdown support
- 📝 Simplified charts
- 📝 Slimmer HTML
💡 Emailimo – Final words
If you like this project, please take a moment and leave the star 🌟 on GitHub. It helps to understand who uses my tools and whether there's a need to work on it further. This applies to all my projects. If you like some of them, take a moment, star them and let me know you like what I do. There is a reason I don't allow comments on my website. I don't want to deal with user's data, spam comments, and all that stuff. Github, Facebook or Twitter are my contact platforms if you need to get in touch.
💡 Dashimo – How to Install
So you know how to use Emailimo? Well, this is how you install it.
Install-Module Emailimo -Force
That's it. Notice how I'm using Force. I use force because it redownloads Emailimo but also any required modules. You see when I update Emailimo, I often update PSWriteHTML and PSSharedGoods. When you do Update-Module Emailimo, it won't auto-update the required modules. Also if I will decide to split PSSharedGoods into smaller modules and change something about it Update-Module will also ignore this. That's why I prefer using Force switch and be prepared! You, of course, should use it the way you want to!

